We get quite a few questions about our chicken coop from time-to-time, so we thought we’d put together a post with some pictures of our chickens in their home environment.
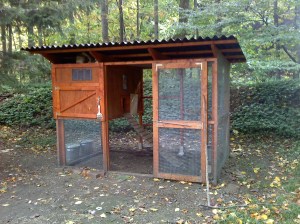
Backyard Garden Chicken Coop
Choosing the location
We thought long and hard about where we wanted our chickens on our property, and in what kind of place we wanted them to live. We live in a normal neighborhood where chickens are quite unusual, and so we didn’t want to be the bane of our neighbors existence by turning the backyard into a petting zoo or litter it up with junked up buildings and contraptions. We have just under an acre of property with a wooded section at the very back. We placed the coop as far from the house as possible. Honestly, we did this for a couple of reasons. First and foremost was an expectation that it would stink. There’s no smells to speak of unless you stick your noggin directly in the hen house or just don’t take care of the birds. Also, we garden extensively and didn’t want our wandering chickens to eat the fruits of our labor. That too has not proven to be a problem. We let our chickens free range a little each day (usually), and they’ve never wandered more than 100′ from their coop. This is in part because we wrangle them like sheep if they go where we don’t want them.
Choosing the coop design
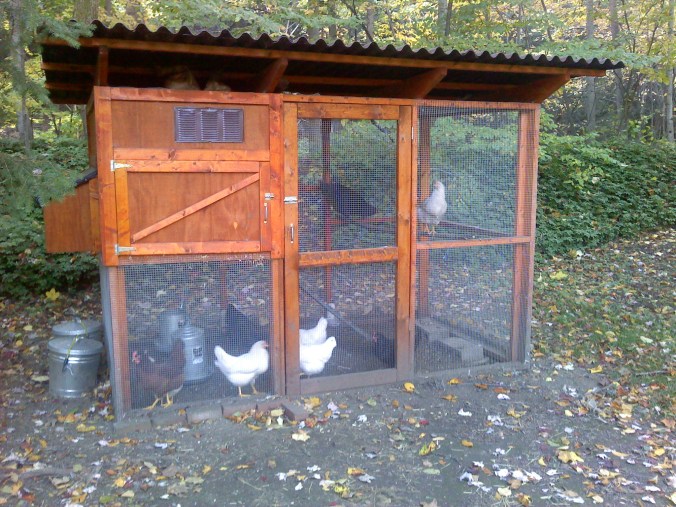
Modified "Garden Coop" design
After much searching around, we found plans online for a The Garden Chicken Coop. We really liked some of the features, but quite honestly, found it lacking in a few ways. That’s not to speak poorly of the design or designer. It’s a plan that allows for customization. We also didn’t care for all the materials used or some of the design. We heavily modified the plans, keeping primarily the main rough framing concepts and the roof design. Everything else we switched around. It was a good starting point.
To the original Garden Coop Design, we first added an external clean out door so we could clean the contents of the hen house out and place them right into a waiting wheel barrow. The existing design had the clean out door much smaller and inside the coop which made little sense to us. Yes, we could get a wheel barrow inside the coop, but that’s far more cumbersome than doing it from outside.
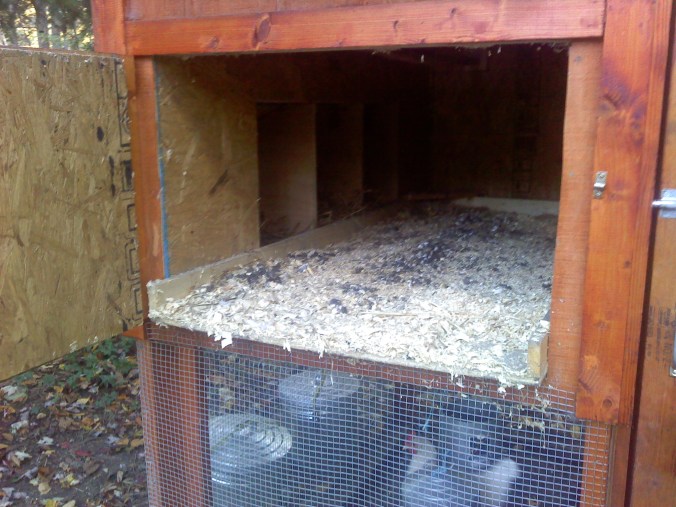
Garden Coop Modification: Front Clean out Door
Secondly, the existing design had the chickens walking up a ramp/ladder into the floor of the hen house. We chose to place this on the side so that we had more floor space. This also allowed us to build a floor that completely slides out for cleaning.
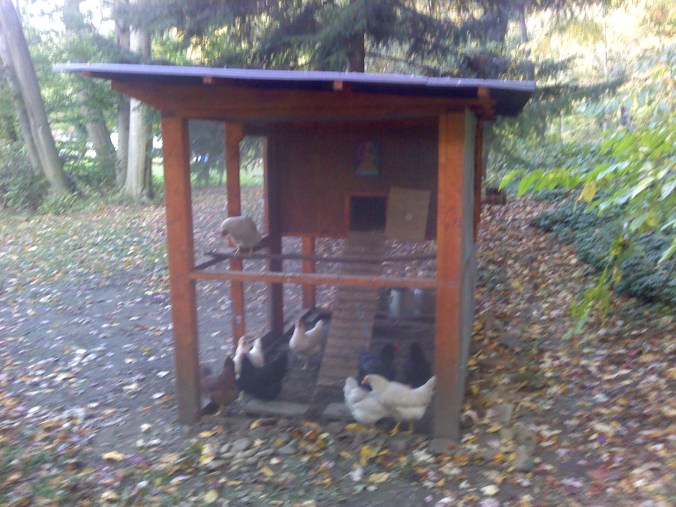
Garden Coop Modification: Chicken Ladder going into side of chicken coop
Since we got into this poultry stuff for eggs, we also wanted an easy way to get access to the eggs. The Garden Coop design had one small door and seemed like it would require at times, blindly reaching into this little door to fish out eggs. It also required using some of the hen house floor space for the egg boxes which might make them get crapped in more often, thus making the eggs even more dirty than they already get. We solved this by building external nest/egg boxes with a hinged roof. This makes fetching eggs simpler and also allows us to easily replace the nest box bedding. The original design was described as being fit for up to 8 birds. We had 10 (lost one due to illness) and currently have nine in ours now. The nest box changes gave us room for an extra bird or two.
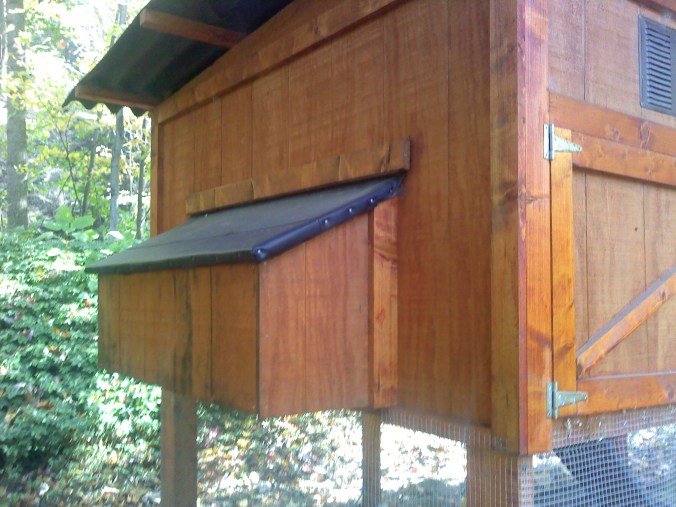
Garden Coop Modification: Egg/Nest Boxes
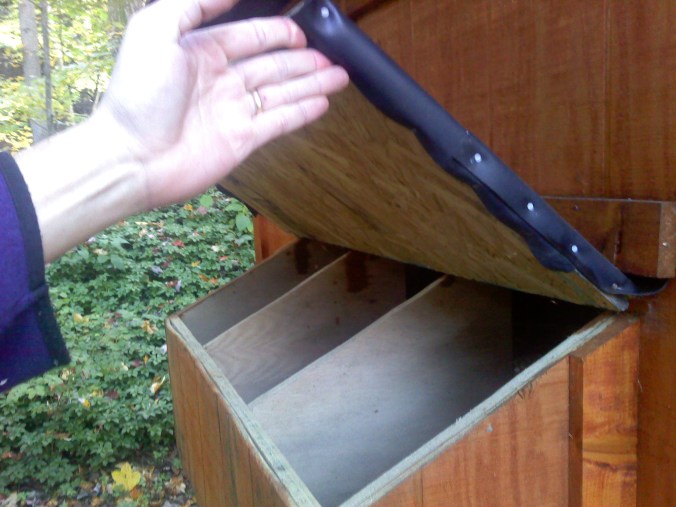
Garden Coop Modification: Egg/Nest Boxes with Accessible lid
While we really like cedar, it seemed a bit overkill and also more labor intensive as an outside wall material. Instead, we used OSB for the inside walls and T111 siding for the outside wall sheeting. We trimmed the outside with pine 1x. We chose Australian Timber Oil By Cabot for the outside finish since we had used this on our children’s fort and swing set with much success. We also added two vents (one on the front, one on the back) to make sure that there was plenty of ventilation which is very important with chickens. This was easy to do, however we could not center the vents on the walls because of our roost location inside. No big deal.
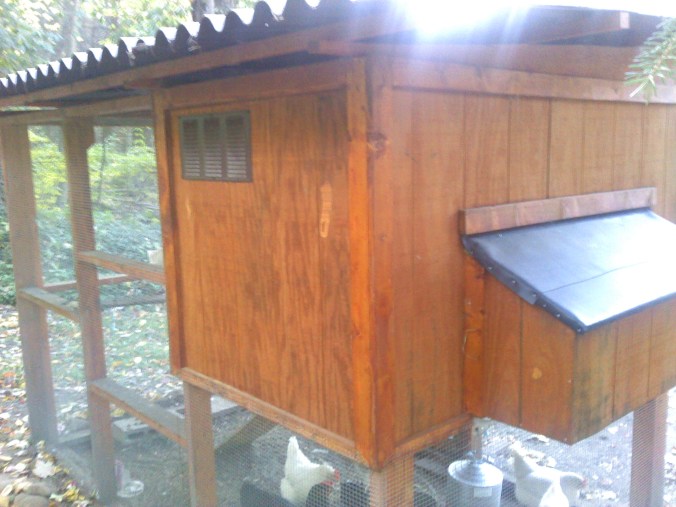
Garden Coop Modification: T-111 siding
The original plans also called for a clear roof. Since this was wooded, we knew that there would likely be leaves and other debris on the roof and didn’t really feel like looking at it all the time. Also, we wanted to make sure the chickens got plenty of shade when needed. We decided on Ondura roof sheeting. It was reasonably priced, opaque, and very easy to work with. It comes in a variety of colors. We chose brown since we had used the same material and color on our children’s fort.
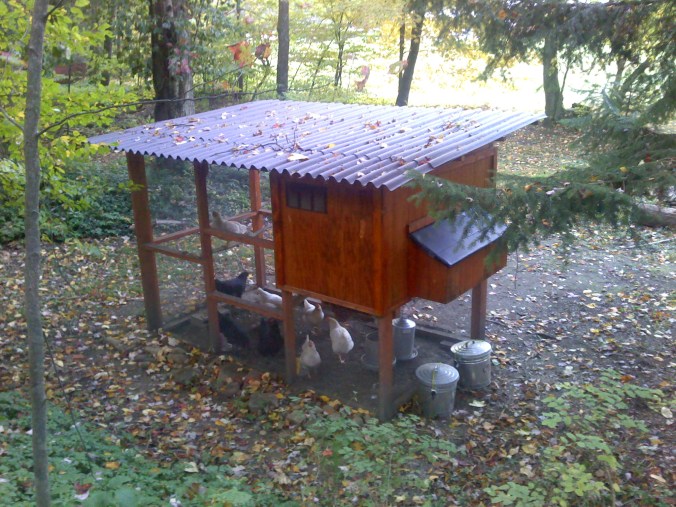
Garden Coop Modification: Ondura Roof
Lastly, the plans called for the door to swing to the inside. We changed this so that it open to the outside. This just made the construction easier in some ways and also makes it easier to get into the coop without letting chickens out, and also without swinging the door into them.
Building the coop
We’re a pretty handy set of people, so it took about one day to get the framing finished. It took another afternoon to place the inside/outside walls on, another day to stain the entire coop, and about a day and a half to place all the hardware cloth in place. The roof took about 3 hours. This was done with the help of a friend, so two adults for most of the project.
Is it safe for the chickens?
The Garden Coop design calls for burying the hardware cloth about a foot under ground on all sides of the coop. We thought this was good advice and followed it. We’ve not lost a chicken yet to a predator (pretty amazing since we live in the mountains of PA!). We’ve seen no signs of attempted break-ins either. This is a very secure design if followed carefully.
Future additions & what we’d do different next time
One of the downsides of our coop’s distance from the house is that it’s far from a power source. We plan on running some wire down to the coop so we can install some lights on a timer to keep egg production up. We also want to have the option of having a heat lamp if it gets too cold, and also a heated watering dish. We’ve already purchased the timer and lights, but haven’t mustered up the gumption to trench 190′ of power line down to the coop.
Had we to do over again, we would have made the back wall of the nest/egg boxes also hinged to make it even easier to clean. It’s not cumbersome now, but could be slightly better. We’d also have extended the area under the nest boxes to create a shelved “locker” on the outside to store our galvanized feed cans in. They currently sit under the egg boxes. We’ve not had any problems with animals, but would like them to stay a bit cleaner. We might still do this later on as an upgrade.
Lastly, clean out doors on the front AND back would be great. That would make every area of the hen house cleanable from the outside without crawling into it. We can make do as is, but it would have been nicer that way.
Hi there,
Your coop is awesome! I just bought the Garden Coop plan myself and want to make the same modifications that you did. Do you have any more detailed shots or instructions or tips that you could pass on? I really like the slide-out floor and external egg boxes. Since this is my first construction project, I thought I’d ask to see if you have any wisdom to pass on in terms of making these changes.
Thanks! =)
LikeLike
Im seriously impressed by your coop! Such style and grace! I’ll have to link to your blog.. Keep up the good fight
LikeLike
This is a wonderful post. My husband and I just bought these plans and will start building soon. I stumbled across your post while looking for a way to move the nest boxes to external. Do you have any advise on it? how did you do it? did you need to add more supports?
I think we are also going to move the ladder position, and make an external cleaning door. Thanks for posting, i hope it is working out well.
LikeLike
Sorry, I just saw this. Somehow I’ve been missing comments for moderation. I can provide some insights on how to do this. I am sending you a private email as a follow-up.
LikeLike
I love your chicken coop!!!!!!
LikeLike